Manage multiple server connections
![]() Available on all plans
Available on all plans
![]() Cloud and self-hosted deployments
Cloud and self-hosted deployments
Using the Mattermost desktop or mobile app, you can connect to multiple Mattermost instances from a single interface.
Note
If you’re using the desktop app prior to release v5.0, individual servers display as separate tabs at the top of the window instead of the top left corner of the window as a list, and servers are managed by going to … > File > Settings on Windows and Mattermost > Preferences on Mac.
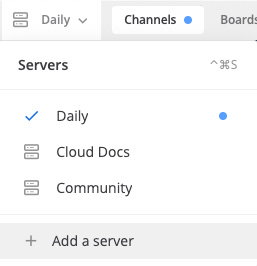
The Server list is located in the top left corner of the window and displays all servers available. Drag to reorder the servers in the list. You can also navigate the server options using keyboard shortcuts. From the Server list, you can add, edit, and remove servers.
Add a server
Select Add a server.
Enter the server URL. Server URLs must begin with either
http://orhttps://.Enter the server’s Display Name.
Tip
Can’t find your Mattermost server URL? Ask your company’s IT department or your Mattermost system admin for your organization’s Mattermost Site URL. It’ll look something like
https://example.com/company/mattermost,mattermost.yourcompanydomain.com, orchat.yourcompanydomain.com. These URLs could also end in.net.Select Add.
Edit a server
Hover over a server and select the Edit icon.
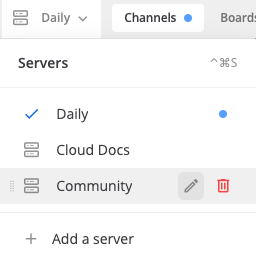
Modify the server’s display name or URL, then select Save.
Remove a server
Removing a server from your desktop app doesn’t delete its data. You can add the server back any time.
Hover over a server and select Remove.
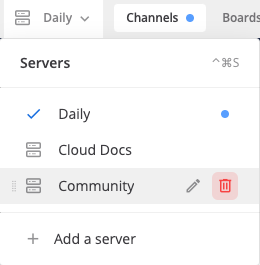
Select Remove when prompted to confirm.
Tap the Servers  icon located in the top left corner of the window to access all available servers and to add new servers.
To configure a new server accessible through the mobile app:
Tap Add a server.
Enter the server URL. Server URLs must begin with either
http://orhttps://.Enter the server’s Display Name.
Tap Done.
Tip
Can’t find your Mattermost server URL? Ask your company’s IT department or your Mattermost system admin for your organization’s Mattermost Site URL. It’ll look something like https://example.com/company/mattermost, mattermost.yourcompanydomain.com, or chat.yourcompanydomain.com. These URLs could also end in .net.


