Administrator Onboarding Tasks
![]()
![]()
Once you’ve successfully installed or upgraded Mattermost, before rolling out Mattermost to your organization, it’s important to take some time to review your workspace configuration to deliver the best possible Mattermost user experience.
We recommend reviewing configuration settings to ensure that:
We also encourage you to explore all of the settings available in the System Console. See our Configuration Settings documentation for details on all supported options.
Tip
Looking for more structure and guidance to plan out your Mattermost rollout? See our Enterprise roll out checklist documentation for details.
You can also manage Mattermost configuration settings in a
config.jsonconfiguration file, located in themattermost/configdirectory. See our configuration settings documentation for details onconfig.jsonfile equivalents.Anything you can do through the Mattermost interface you can also do through the Mattermost REST API.
You can share important announcements within Mattermost by displaying an announcement banner visible to all users.
Review Mattermost workspace configuration
First, visit the System Console > Environment page to ensure your workspace is accessible and performant.
Go to… |
To… |
|---|---|
Web Server |
Ensure your workspace is accessible online. See the Web server documentation for details. |
Database |
Ensure that data management is configured for your needs. See the Database documentation for details. If you have a High Availability environment using PostgreSQL, we also recommend specific optimizations. See the High Availability Cluster recommendations documentation for details. |
File Storage |
Ensure that file storage is configured for your needs. See the File storage documentation for details. |
SMTP |
Enable real-time Mattermost notifications for your users. See the SMTP documentation for details. |
Push Notification Server |
Real-time mobile push notifications are enabled by default. You can control the content included in notifications. See the Push Notification server documentation for details. Additional notification notes: Mattermost subscription plans provide access to Mattermost’s Hosted Push Notification Service featuring encrypted TLS connections and production-level uptime service level agreements. See the HPNS documentation for details. Mattermost Enterprise customers can enable ID-Only push notifications so push notification content is not passed through Apple Push Notification Service (APNS) or Google Firebase Cloud Messaging (FCM) before reaching the device. The ID-only push notification setting offers a high level of privacy. |
Next, visit the System Console > Site Configuration page to customize key links and enhance file sharing functionality:
Go to… |
To… |
|---|---|
Customization |
Brand and customize how your users interact with your Mattermost workspace by:
|
File Sharing and Downloads |
File sharing is enabled by default. You can control of the maximum size of file attachments. If your organization frequently works with SVG files, enable previews of SVG attachments. For additional security and protection with file attachments, a ClamAV antivirus integration is available which scans files uploaded to Mattermost. |
From Mattermost v6.5, you can also review a dashboard of insights related to the health of your Mattermost workspace by going to System Console > Reporting > Workplace Optimization. See the Optimize your Mattermost workspace documentation for details.
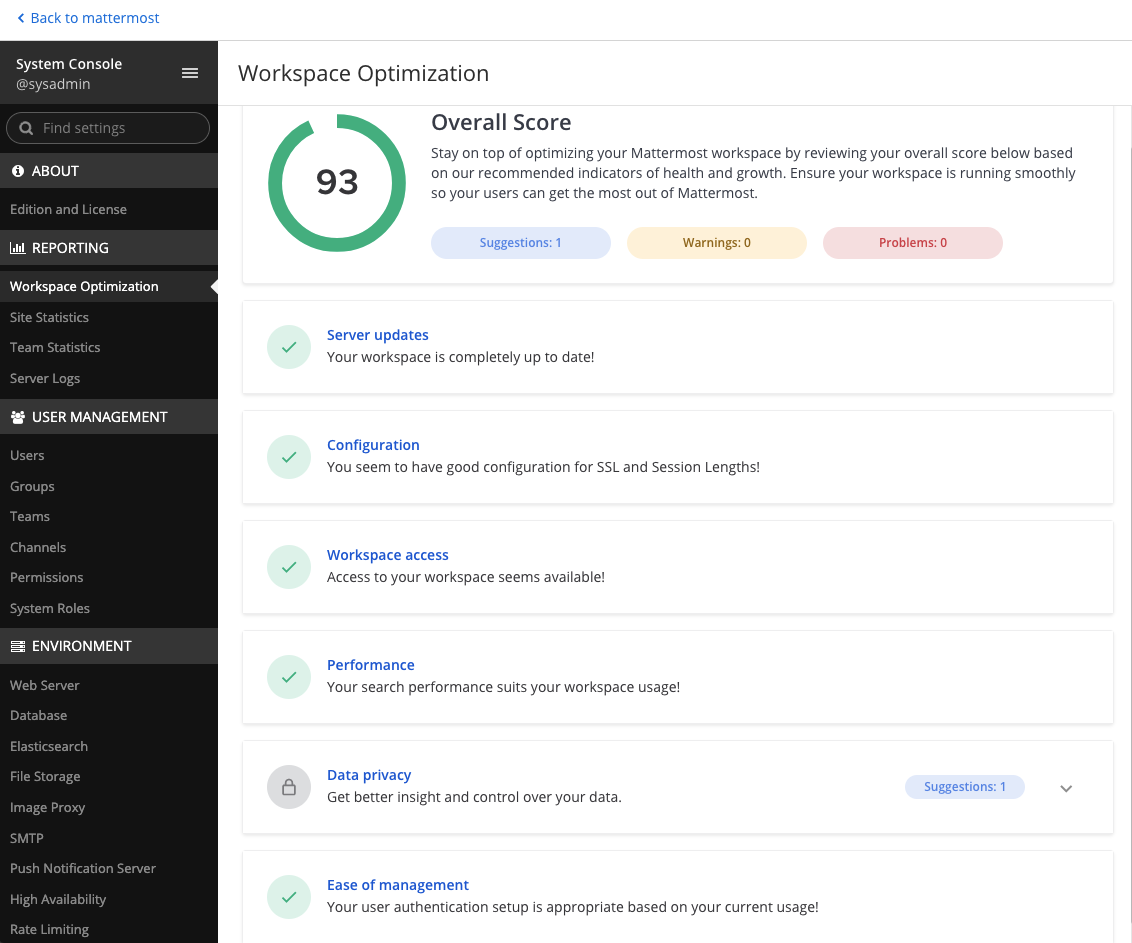
On the dashboard, you can see whether there’s a Mattermost update you should install. Mattermost releases regular updates to Mattermost Team Edition and Mattermost Enterprise Edition. The Mattermost Changelog provides all information about changes in each version. When you upgrade your Mattermost server frequently, your users can access new features, improved user experiences, bug fixes, security fixes, and Mobile App compatibility. Upgrading your Mattermost server only takes a few minutes. See the Upgrade Guide for step-by-step instructions.
Mattermost Enterprise customers can enable Elasticsearch for optimized search performance at enterprise-scale. Elasticsearch solves many known issues with full text database search, such as dots, dashes, and email addresses returning unexpected results. Set up an Elasticsearch server and enable Elasticsearch.
Now you have a functional, performant Mattermost workspace. Next, you want to control product access.
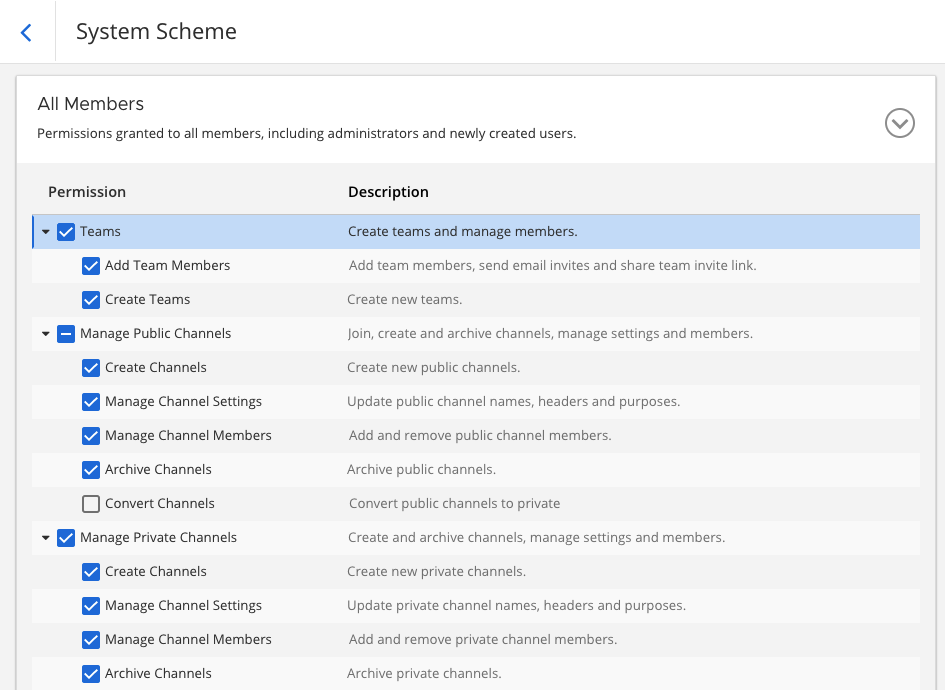
Configure user permissions
Once your Mattermost workspace is configured for your needs, focus next on ensuring the right people can see and do the right things in Mattermost, such as creating teams and managing channels, by controlling product access with advanced permissions, learning about teams, and working with channels.
Tip
Mattermost won’t limit you to the number of teams you can create; however, a public team and an internal team are typically sufficient. See our Creating Teams and our Team Settings documentation for details.
With permissions, you have controls in place over who can do what and where based on the roles and areas of ownership in your organization. Next you want to make it easy for your users to get into Mattermost every day.
Configure user authentication
Make onboarding and account provisioning easier through automation with directory services integrations. You likely already have your users grouped by role, location, or level. Mattermost provides identity management, single sign-on, and automatic account provisioning to make it easy for you to integrate with your existing identity and access management (IAM) services and systems with Active Directory and LDAP and SAML 2.0 SSO. These integrations feature providers like Active Directory Federation Services, Okta, GitLab, Google, and Office 365
Begin to onboard users by enabling account creation or by connecting an authentication service to assist with user provisioning.
For bulk onboarding, enable AD/LDAP Group Synchronization to ensure new users are added to default teams and channels as they join Mattermost. See our AD/LDAP Groups documentation to learn more.
See our migration guide and bulk loading documentation for additional details.
Extend Mattermost functionality with integrations
Once you’ve explored the many ways you can configure your Mattermost workspace, and considered our workspace recommendations, you may want to explore many more ways you can extend your Mattermost functionality with integrations. Mattermost features powerful collaboration using context-rich actions. When you extend Mattermost functionality with integrations like Zoom, Jira, GitHub or GitLab, moving around the ecosystem and staying informed is as simple as sending a message and subscribing channels to project or repository updates.
More common Mattermost integrations your users may love:
Create polls with Matterpoll.
Share GIFs with GIF Commands.
Create and share memes with Memes.
Set personal reminders with Remind.
Create and share to do items with Todo.
Customize welcome messages for new users with WelcomeBot.
Visit the Mattermost Marketplace to learn about the many ways you can extend Mattermost functionality for your needs. To enable and manage plugins, go to System Console > Plugins. Then, download plugins from the Mattermost Marketplace.
To enable integrations such as webhooks, slash commands, OAuth2.0, and bots, to go System Console > Integrations. See our developer and integrator documentation for details.
Important Mattermost administration notes
DO NOT manipulate the Mattermost database
In particular, DO NOT manually delete data from the database directly. Mattermost is designed as a continuous archive and cannot be supported after manual manipulation.
If you need to permanently delete a team or user, use the mattermost user delete CLI command, or use the mmctl user delete command.
Create a System Admin account from the command line
If the System Admin leaves the organization or is otherwise unavailable, you can use the command line interface to assign the system_admin role to an existing user. In the
/opt/mattermostdirectory, typesudo -u mattermost bin/mattermost roles system_admin {user-name}, where {user-name} is the username of the person with the new role. For more information about using the command line interface, see Command Line Tools.The user needs to log out and log back in before the system_admin role is applied.
Migrate to AD/LDAP or SAML from email-based authentication
Mattermost Professional or Enterprise customers can migrate from email authentication to Active Directory/LDAP or to SAML Single Sign-on. To set up Active Directory/LDAP, see Active Directory/LDAP Setup. To set up SAML Single Sign-on, see SAML Single-Sign-On.
After the new authentication method is enabled, existing users cannot use the new method until they go to Settings > Security > Sign-in method and select Switch to using AD/LDAP or Switch to using SAML Single Sign-on. After they have switched, they can no longer use their email and password to sign in.
Deactivate a user
System Admins can go to System Console > Users for a list of all users on the server. Search and filter the list to make finding users easier. Select the user’s role, then choose Deactivate. To preserve audit history, users are typically never deleted from the system.
If permanently deleting a user is necessary (e.g. for the purposes of GDPR), an mmctl command or a CLI command can be used to do so. AD/LDAP user accounts can’t be deactivated from Mattermost; they must be deactivated from your Active Directory.
Check for a valid license in Enterprise Edition without logging in
If you manage a self-hosted Mattermost deployment, open the log file mattermost.log. It’s usually in the mattermost/logs/ directory but might be elsewhere on your system. Find the last occurrence of a log entry that starts with the text [INFO] License key. If the license key is valid, the complete line should be similar to the following example:
[2017/05/19 16:51:40 UTC] [INFO] License key valid unlocking enterprise features.


